


Aluminum Patio Door Condensation: Causes and Practical Remedies
Start by locating the moisture on the aluminum patio door. Water on the room-facing frame or glass usually calls for humidity control, better air circulation, or correction of a cold surface. Outdoor dew generally needs no repair. Fog trapped between panes requires investigation of the insulated glass unit. Replacing seals before making this distinction often leaves the original complaint unresolved.
Dry the affected surfaces and note when moisture returns. Record whether it follows a cold night, showering, cooking, rainfall, or windy weather. These observations separate condensation from water entering through joints or collecting in a blocked sill, even when all three leave similar puddles near the threshold.
Locate the moisture before choosing a remedy
Wipe a small area of the room-side glass with a clean cloth. If the mark clears, the moisture is on that surface. Where safe access is available, repeat on the outside. Haze that remains after both exposed surfaces are cleaned points toward the sealed cavity, although deposits, coatings, and scratches also need to be excluded.
More than one condition can occur at once. Interior condensation can drain into a track that already contains rainwater. A failed glass unit can also have condensation on its exposed surface. Photograph the individual locations before drying them so the repair addresses each source.
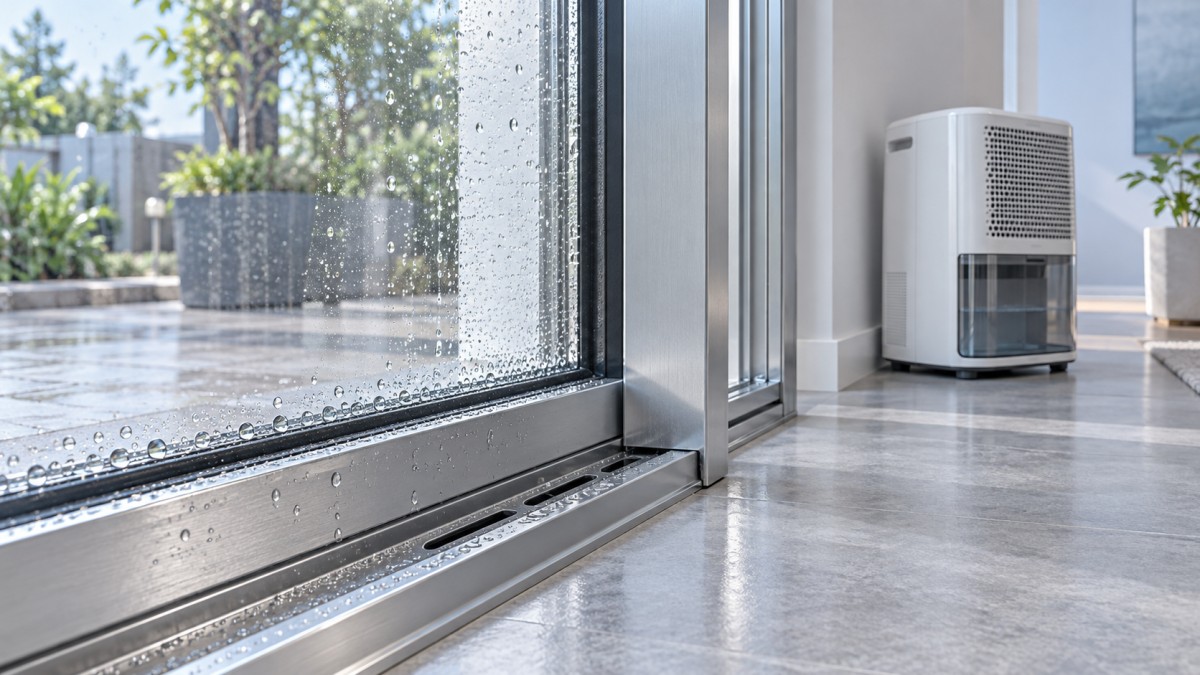
Use dew point to explain room-side condensation
Condensation forms when a surface falls below the dew point of the surrounding air. Aluminum transfers heat readily, so an unbroken metal path between outdoors and indoors creates cold interior surfaces during winter. A thermal break reduces that transfer, but the glass edge, threshold, hardware connections, and installation perimeter can still be colder than the center of the glazing.
Measure indoor temperature and relative humidity near the door, away from direct sunlight and heating outlets. Use those readings to determine dew point with a suitable meter or calculator. Compare it with the temperatures of the wet frame, glass edge, and center pane. The comparison establishes whether the observed room conditions explain the moisture.
Relative humidity alone is an incomplete diagnosis. A reading that causes no problem beside a warm wall can produce droplets on a much colder threshold. A single daytime measurement also misses overnight cooling and short moisture peaks. When the complaint is intermittent, record temperature and humidity through the period when droplets usually appear.
Reflective aluminum and glass complicate infrared measurements. A handheld infrared thermometer can pick up reflected temperatures and report a misleading result. Prefer a suitable contact probe, or use an instrument-compatible measurement patch that will not damage the finish. Compare equivalent locations across the frame; one unusually cold corner deserves closer examination.
Reduce the moisture load and restore air movement
Run bathroom and kitchen extraction during moisture-producing activities and long enough afterward to remove lingering humidity. Confirm that extract ducts discharge outdoors and that grilles are unobstructed. Drying laundry indoors, uncovered cooking, and excessive humidifier settings can maintain a moisture load that repeatedly exceeds the door’s cold-weather tolerance.
A dehumidifier is useful where ventilation alone does not control moisture. Set it according to measured conditions and the need to prevent condensation, rather than assuming one humidity target suits every season. If water continues to form at low indoor humidity, investigate the surface temperature and door assembly more closely.
Closed curtains and tight blinds trap a pocket of cooler air beside the glazing. Leave room for indoor air to circulate, especially near the bottom rail. Move furniture away from heating outlets and avoid covering the threshold with thick rugs. Compare condensation with coverings open and closed under similar weather conditions to establish whether restricted airflow contributes.
Keep indoor heating reasonably steady during cold periods. A deep overnight setback cools the frame while moisture remains in the room. Brief ventilation helps when outdoor air contains less moisture, but prolonged opening in cold weather also chills adjacent surfaces. Judge the result from humidity and surface readings rather than the sensation of fresh air.
Persistent wet patches point to local defects
Broad moisture across the glass and frame suggests a room-wide humidity or temperature issue. A narrow wet line beside the meeting stile, a cold patch around a latch, or one dripping corner suggests uneven closure, air leakage, or a local thermal bridge. Wind-sensitive symptoms strengthen the case for investigating leakage.
Inspect weatherstripping for tears, flattened sections, missing lengths, and contamination. Sliding systems often use pile seals and interlocking profiles; hinged systems rely more heavily on compression gaskets. Identify the original seal type before ordering replacements. A thicker substitute can interfere with closing, increase operating force, or prevent the locking points from engaging correctly.
Confirm that the sash sits squarely and closes fully. Worn rollers, debris in the track, or incorrect adjustment can leave a sliding panel uneven against its seals. Follow the hardware instructions when adjusting rollers or locking points. Excessive compression can distort gaskets without resolving a gap elsewhere.
For perimeter symptoms, inspect the connection between the frame and wall. Missing insulation, discontinuous interior air sealing, and conductive installation details can create cold zones even when the door profile contains a thermal break. Repair accessible defects with compatible materials while preserving the assembly’s drainage and movement allowances. Surface caulk alone will not correct missing insulation deeper in the opening.
A wet threshold needs a separate drainage diagnosis
Water in a sliding track does not automatically indicate a defective door. Many systems collect limited water in designated channels and discharge it outside. Determine which channel is wet, whether water exits through the designed outlets, and whether it crosses into an interior track intended to remain dry.
Remove loose dirt and inspect accessible drainage openings using the door’s maintenance instructions. Clear debris without enlarging holes, damaging baffles, or pushing material deeper into concealed passages. Internal chambers differ between profiles, so an opening that resembles a drain should not be drilled through without confirming its purpose.
Where a drainage test is appropriate, introduce a small, controlled amount of water into the designated collection channel and observe the discharge. Stop if water approaches interior finishes. A pressure hose can force water past joints that do not encounter that exposure during ordinary use, making the diagnosis less reliable.
Do not seal drainage slots to stop a draft or conceal standing water. Blocked outlets raise the water level inside the sill and encourage leakage toward the room. Missing drain covers or baffles should be replaced with compatible parts where the design requires them.
Water appearing mainly after rain, especially around upper corners or wall finishes, warrants investigation beyond condensation. Inspect perimeter joints, sill support, flashing, and the surrounding opening. Moisture first appearing above the door suggests a different entry path from droplets forming along the bottom glass edge.
Exterior dew and sealed-unit fog need different responses
Exterior condensation develops when the outer glass surface cools below the outdoor dew point. Clear skies allow the glazing to lose heat toward the sky, while humid, still air supports dew formation. Well-insulated glazing can exhibit this effect because less indoor heat reaches the exterior pane. Outdoor dew alone does not establish a failed seal or poor thermal performance.
Observe whether it clears as the morning warms or air movement increases. Persistent marks after the water evaporates need cleaning or assessment for surface deposits. Replacing room-side weatherstripping will not prevent this weather-driven exterior effect.
Moisture inside an insulated glass unit has a different significance. Once confirmed within the sealed cavity, it indicates that moisture control within the unit has been compromised. Clouding may come and go as conditions change, so temporary clearing does not prove that the edge seal has recovered.
Document the affected pane, glazing build-up, visible markings, and location of internal haze. Replacement of the insulated glass unit is the usual durable remedy. Before reglazing, assess glazing blocks, edge clearance, gasket condition, and drainage around the glass rebate. Standing water or incorrect support can contribute to repeat edge-seal problems.
Drilling or venting a sealed unit changes its construction and does not restore the original insulating arrangement. Any proposed repair needs to be evaluated against the unit manufacturer’s method and the required performance, including the safety-glazing specification for the door.
When the frame remains too cold
If condensation persists despite controlled indoor moisture, unobstructed airflow, correct closure, and sound installation, the frame’s thermal design deserves attention. An older aluminum patio door without a thermal break can remain substantially colder at its interior metal surfaces than a system with an effective insulating separation. Improved center-pane glass alone leaves those metal paths in place.
When comparing replacement assemblies, examine the complete frame, threshold, glazing edge, and installed junction. Profile thickness and the presence of a thermal-break label do not establish the temperature of every interior surface. Whole-assembly performance information and relevant installation details are more useful than a single material description.
For example, the specifications for Retractable gate list aluminum alloy profiles, thermal insulation, and EPDM seals. These describe construction features; they do not establish condensation resistance for a particular patio-door opening. The opening configuration, threshold detail, glazing specification, and verified assembly performance still require confirmation before applying those features to a replacement decision.
Verify the repair under comparable conditions
After corrective work, dry the door and record the changes made. Revisit the locations that first became wet during comparable weather and indoor moisture conditions. Lower humidity, a warmer repaired corner, restored drainage, and elimination of a closure gap provide different evidence; record the result relevant to the original cause.
A dry afternoon immediately after adjustment does not establish that a cold-night complaint has been resolved. Retain the baseline readings and photographs, then compare them with observations from the next relevant cold or rainy period. If moisture returns, its location and timing provide a clear starting point for the next investigation.
Related Posts
CONTACT US

First class quality service and professional after-sales team.
Get in Touch
*We respect your confidentiality and all information are protected.